Showing posts with label oil painting. Show all posts

Friday, November 20, 2020

Flashback Friday: John Singer Sargent & The Atelier Methods of Carolus-Duran (his teacher)


Jane & Wilfred de Glehn in Italy by Sargent (detail)
This is a previously published article from my older blog thinkingaboutpainting.blogspot.com 

Carolus-Duran was the progressive painting instructor in Paris with whom Sargent chose to study. 

His teaching diverged greatly from other painters of that time because of the emphasis on color and form, created with direct and painterly brushwork, with inspiration from past master Velasquez. 

This method of painting was very different than the academic norm at the time, which emphasized smooth blending. 

Sargent's facility with a brush is almost universally admired among oil painters and an examination of how he achieved such beautiful realism combined with gorgeous brushwork is of interest to many of us, so I thought it would be good to find out more about the method he learned from Carolus-Duran.

I found this quote, taken from The Lure of Paris: Nineteenth-Century American Painters and Their French Teachers by H. Barbara Weinberg, very interesting as the painting procedure described is still practiced by painters today, such as Cedric Egeli:

Despite his gifts as a draftsman and his success in the Ecole des Beaux-Arts, there is almost no easel painting by Sargent, from his atelier studies to his most ambitious late portraits and outdoor genre works, that does not disclose an affiliation with the painterly, anti-academic manner of Carolus-Duran. Sargent’s early Blonde Model vividly exemplifies Carolus-Duran’s method, as described by R.A.M. Stevenson, an English painter, and later writer, who also entered the atelier in 1874:
No preparation in colour or monochrome was allowed, but the main planes of the face must be laid directly on the unprepared canvas with a broad brush. These few surfaces – three or four in the forehead, as many in the nose, and so forth – must be studied in shape and place, and particularly in the relative value of light that their various inclinations produce. They were painted quite broadly in even tones of flesh tint, and stood side by side like pieces of a mosaic, without fusion of their adjacent edges. No brushing of the edge of the hair into the face was permitted, no conventional bounding of eyes and features with lines that might deceive the student by their expression into the belief that false structure was truthful . . . you must make a tone for each step of a gradation. Thus, you might never attempt to realize a tone or a passage by some hazardous uncontrollable process.
Also, here is an account of how the studio ran by Carolus-Duran functioned, taken from A Manual of Oil Painting by John Collier:
The model was posed on Monday, always in full light, without shadow effect, and against a strongly-coloured background, which we had to imitate exactly in its relations to the figure. The figure was drawn in in charcoal, then we were allowed to take a sable and strengthen the outline with some dark colour mixed with turpentine, but not to make any preparation, nor put in conventional dark brown shadows.

The palette was set as follows: Black, verte emeraude, raw umber, cobalt, laque ordinaire, brun rouge or light red, yellow ochre, and white (the colors being placed on the palette in this order from left to right).

We were supposed to mix to or three gradations of yellow ochre with white, two of light red with white, two of cobalt with white, and also of black and raw umber to facilitate the choice of tones.


We were not allowed any small brushes, at any rate not for a long time—many months or years.


On Tuesday Duran came to criticize and correct the drawing, or the laying in of painting if it was sufficiently advanced. We blocked in the curtain first, and then put in the figure or face in big touches like a coarse wooden head hewn with a hatchet; in fact, in a big mosaic, not bothering to soften things down, but to get the right amount of light and the proper colour, attending first to the highest light.


The hair was not smoothed into the flesh at first, but just pasted on in the right tone like a coarse wig; then other touches were placed on the junctions of the big mosaic touches, to model them and make the flesh more supple.

Of course these touches were a gradation between the touches they modelled. All was solid, and there were no gradations by brushing the stuff off the lights gently into the darks or vice versa, because Duran wished us to actually make and match each bit of the tone of the surface. He came again on Friday to criticise and on that day we finished off.

Finally, here are some painting notes attributed to Sargent and recorded by http://gurneyjourney.blogspot.com/2009/02/sargents-painting-notes.html 

1. Painting is an interpretation of tone. Colour drawn with a brush.

2. Keep the planes free and simple, drawing a full brush down the whole contour of a cheek.

3. Always paint one thing into another and not side by side until they touch.

4. The thicker your paint—the more your color flows.

5. Simplify, omit all but the most essential elements—values, especially the values. You must clarify the values.

6. The secret of painting is in the half tone of each plane, in economizing the accents and in the handling of the lights.

7. You begin with the middle tones and work up from it . . . so that you deal last with your lightest lights and darkest darks, you avoid false accents.


8. Paint in all the half tones and the generalized passages quite thick.

9. It is impossible for a painter to try to repaint a head where the understructure was wrong.

PALETTE: Silver White, Naples Yellow, Yellow Ochre, Ochre dew (English Red), Red Ochre, Vermillion, Ivory or Coal Black, and Prussian Blue.

James Gurney explained his interpretation of the above notes as follows: 

For me, one of the keys of understanding Sargent is looking at the painting methods of his teacher Carolus Duran, who had a somewhat unusual method compared to other academic teachers. In a nutshell he tended to block in the tones in discreet mosaic-like patches at first (like a plane head, if you're familiar with those things) and then later in the game you blend the patches into each other 
I believe this method gives the best tonal accuracy, which is what he's singing about in #5.
Regarding #7 about starting with the middle tones, I believe he means that right away you want to make your big value statement (or the 'effet' as they called it), but you should reserve your very darkest accents and lightest highlights for final, carefully considered touches.
Make sure to download this wonderful account of Sargent's painting methods:
http://www.goodbrush.com/misc/painting_lessons/sargent_notes.pdf

For more information on this subject, check out this detailed blog post: 
And here are a couple of articles from the 1800's that are linked in the above mentioned blog: 
http://dl.dropbox.com/u/16620532/The-Century-Magazine-Jan1886.pdf
http://dl.dropbox.com/u/16620532/The-Contemporary-Review-May1888.pdf

Tuesday, November 17, 2020

Painting Without Solvents - More Tips for Oil Painters!


I recently received an email from a reader, asking a question about solvent-free oil painting:

* I have re-published the article referred to below, along with some of the previous comments that provide further information.
Hi Laurel,
I came across your article on oil painting without solvents which I need to start doing as I have developed a real allergic reaction to OMS type thinners. You mentioned that you use walnut oil as a medium for cleaning your brushes. Have you tried Safflower oil? or will that cause problems with my oil paintings. The reason I ask is the Walnut oil, which I use to thin my oils has become very expensive. Anyway, if you have had experience with that I would really appreciate any feed back about that as I don't want to give up painting with oils.
Thank you, LP
Here is my reply:
Thanks so much for your letter, LP. Hang in there, you definitely do not have to retire your oils! 
I am sorry to hear that you have developed an allergy to odorless mineral spirits (OMS). I do use it sometimes, usually outdoors, but tend to avoid it in favour of straight paint (often initially applied with a palette knife) or sometimes a medium that with only a little OMS.
You might want to give some thought to your method of painting. For instance, alla-prima painting is conducive to working without solvents. Once you have some paint on the support, there is no need for thinners. I often use a palette knife to put on the first layer; then, as long as it remains wet (usually a few days if using the right pigments - avoiding earth shades like umbers and ochres, for instance, that dry quickly) you can easily blend and work the paint without any solvents until it starts to tack up. I use a small container of walnut oil, dipping in without touching the sides of the container to avoid a mess and wiping off the brush between colors. If you like to let the work dry between layers, oiling out, as discussed in my article below is another option. Particularly when painting in layers, a solid support will age better (less cracking due to movement) than stretched canvas. 
Walnut oil is an excellent substitute for OMS and is much more archival, creating a stronger paint film. For cleaning brushes, I have used safflower oil, so your instincts are correct. In fact, as long as you wash the brushes thoroughly with soap and water afterward, you can use any vegetable oil. Since safflower is also a drying oil (along with walnut and linseed), if it does end up in your paint film, it will not prevent the painting from drying properly, so it is a safer choice than generic vegetable oil, yet still more affordable than walnut oil.   
Interestingly, I recently came upon some information that slightly contradicts some of my previous practices. Apparently, to preserve your brushes, some painters recommend soaking new brushes in mineral oil (baby oil) before using, as this will deposit non-drying oil in the ferrule and prevent paint from permanently stiffening and ruining brushes. We should be using only the ends of our brushes for painting, perhaps halfway up the bristles, but I know I often lose control and end up with a brush soaked in paint right up into the ferrule. Because of my messy habits, I am now thinking about using this method to preserve my brushes. I could then use any oil to remove most of the paint and wash with soap and water. I guess the only risk here is some of the non-drying oil preventing your painting drying! I think the risk is low if you clean the brushes thoroughly after rinsing in safflower oil. 
Another idea to save yourself a lot of time washing brushes every time you paint (in addition to suggestions in the article below) is to suspend them in oil. There are brush washers that have a wire coil to hang them from - just fill the bottom with walnut oil (after wiping them off thoroughly to get rid of most of the paint) and suspend them with just the bristles in the oil. When you are ready to paint again, wipe them off and get to work. With this method, you would not be using as much walnut oil, so could save some dollars that way. I hope that helps! Any further questions, please post a comment and I will get back to you here. 
Happy painting, LP - let me know how it goes!
An additional comment I have, is to use a 3-bucket, environmentally friendly method of brush cleaning if you are worried about your plumbing (and care about the environment) - that way, only microscopic amounts of oil (and toxic pigment) will go down the sink - you have more worries from your cooking pots!

*stock photo


Here is the original article with some of the comments:


PAINTING WITHOUT SOLVENTS

(As published in Curry's Artwise Newsletter, March 2007)


I spent many years painting with watercolors and acrylics because I was scared of solvents.I didn’t want to deal with something so toxic on a regular basis. This was a real shame, because I now paint almost exclusively with oils and I love the buttery texture, lack of color shift (the color, when dry, is exactly the same value as when you put it down, rather than darker as in the case of acrylics, or lighter when using watercolor) and ease of revising my work. Of course, you can always use water soluble oils, but as a professional portrait artist, I prefer traditional oils. It came as a revelation to learn that solvents were not necessary when painting with traditional oil paints, in fact, for archival reasons, it is actually preferable to not to use them at all in painting mediums. Another benefit from painting without the use of solvents is that there is no need for complicated ventilation systems and no worries about the fumes affecting the health of yourself and family members.

I use paint straight from the tube and do not usually use a painting medium, other than a very small amount of cold pressed linseed oil or walnut oil if the paint is too stiff.Sometimes, when adding a second or third layer of paint, I will “oil out” the surface by adding a microscopically thin layer of oil before beginning to paint again. After sprinkling the oil over the area with a palette knife and rubbing it in with a rag, it is a good idea to use a small makeup sponge to remove any excess oil. Using the “oiling out” technique accomplishes the same thing as retouch varnish, without the solvents, by bringing back the original appearance of the piece, refreshing any dry or sunken areas and facilitates matching colors. It also helps the paint flow on more smoothly due to the wet surface.

While I am painting, I try to use a lot of brushes, keeping at least one brush for each value so I don’t have to rinse clean the brush in solvent as I paint. I have a brush holder, which is fairly easy to make, that holds 3 rows of 11 brushes (yes, you read that correctly, 33 brushes) but I don’t always use that many, sometimes making do with just one row of 11 brushes, for 9 values plus black and white. The system, inspired by one of my past instructors, Marvin Mattelson (who teaches at The School of Visual Arts in New York City), involves using small, medium and large brushes in three rows. Being somewhat organizationally challenged, I usually get them mixed up, but it is fairly easy to just dip the brush in some walnut oil and wipe it off on a paper towel or rag if necessary. Although Marvin’s version of the brush holder is somewhat sophisticated, with several sizes of holes being drilled inside each other to fit various sizes of brush handles, a simpler version can easily be made by drilling holes large enough to fit your biggest brush handle in a foot long chunk of 2x4. Yes, you do have a lot of washing up at the end of the day, but because walnut oil is slow drying, it is possible to avoid the task for a day or two by dipping the brushes in oil and wrapping them in plastic. Before using them the next day, wipe the brushes clean, rinsing with walnut oil if necessary. Solvents are very drying to your brushes, so an added benefit to cleaning brushes with oil instead is that they will be kept in better condition. By the way, this method of delaying brush washing is best used when painting without lead based whites, which tend to dry quickly.

For final cleaning of the brushes, walnut oil can very successfully be substituted for mineral spirits, as the texture of this type of oil is thinner than other vegetable oils, which are usually too viscous to allow the pigment to fall to the bottom of your brush cleaner in a timely manner. M. Graham, a company that also makes very nice paints, supplies walnut oil specifically geared for artistic use, as opposed to putting it on your salad! Beware that using vegetable oils from the supermarket may compromise the integrity of your paintings, as most oils are non-drying and traces may remain in the brush after washing with soap and water.

To begin cleaning my brushes, I first dip them in the oil and then wipe them on a page from an old phone book (which is a great way to reuse and recycle, as it cuts down on the amount of paper towels used and ultimately trees as well) until most of the pigment comes out. Simply tear off the page when it becomes too full of paint. The next step is to rinse the brush in the oil in the same way you would use solvent. I have a fancy stainless brush cleaner, but I also use coffee tins with a tuna size tin, punched full of holes and turned upside down in the bottom (hammer holes in it using a big nail) on which I rub my brush to get out the last remnants of paint before washing with soap and water. When I feel that my bar of soap isn’t getting all the paint out (sometimes I neglect to clean the brushes promptly, making it more difficult to get them thoroughly clean) I use “The Master’s” soap instead of my usual bar, letting it stay in the bristles overnight if they are really gummed up, and that does the trick!

Finally, I am going to share with you a tip for cleaning brushes that was passed on to me by William Whitaker, a wonderful artist with decades of experience. This tip alone was worth the price of admission to his workshop at the Scottsdale Artist's School. After getting soap into the brush, grab the end of the bristles with your left hand and, while holding the brush handle with your right hand, wiggle the brush handle back and forth several times - doing this helps remove the stubborn paint that is close to the ferrule and will extend the life of your brushes.

Painting with the method I have outlined is better for your health and the environment. If you have always wanted to use traditional oils, but hesitated because of concerns about solvents, this is your chance to experience all the joy of painting with oils with none of the drawbacks!

Saturday, January 26, 2019

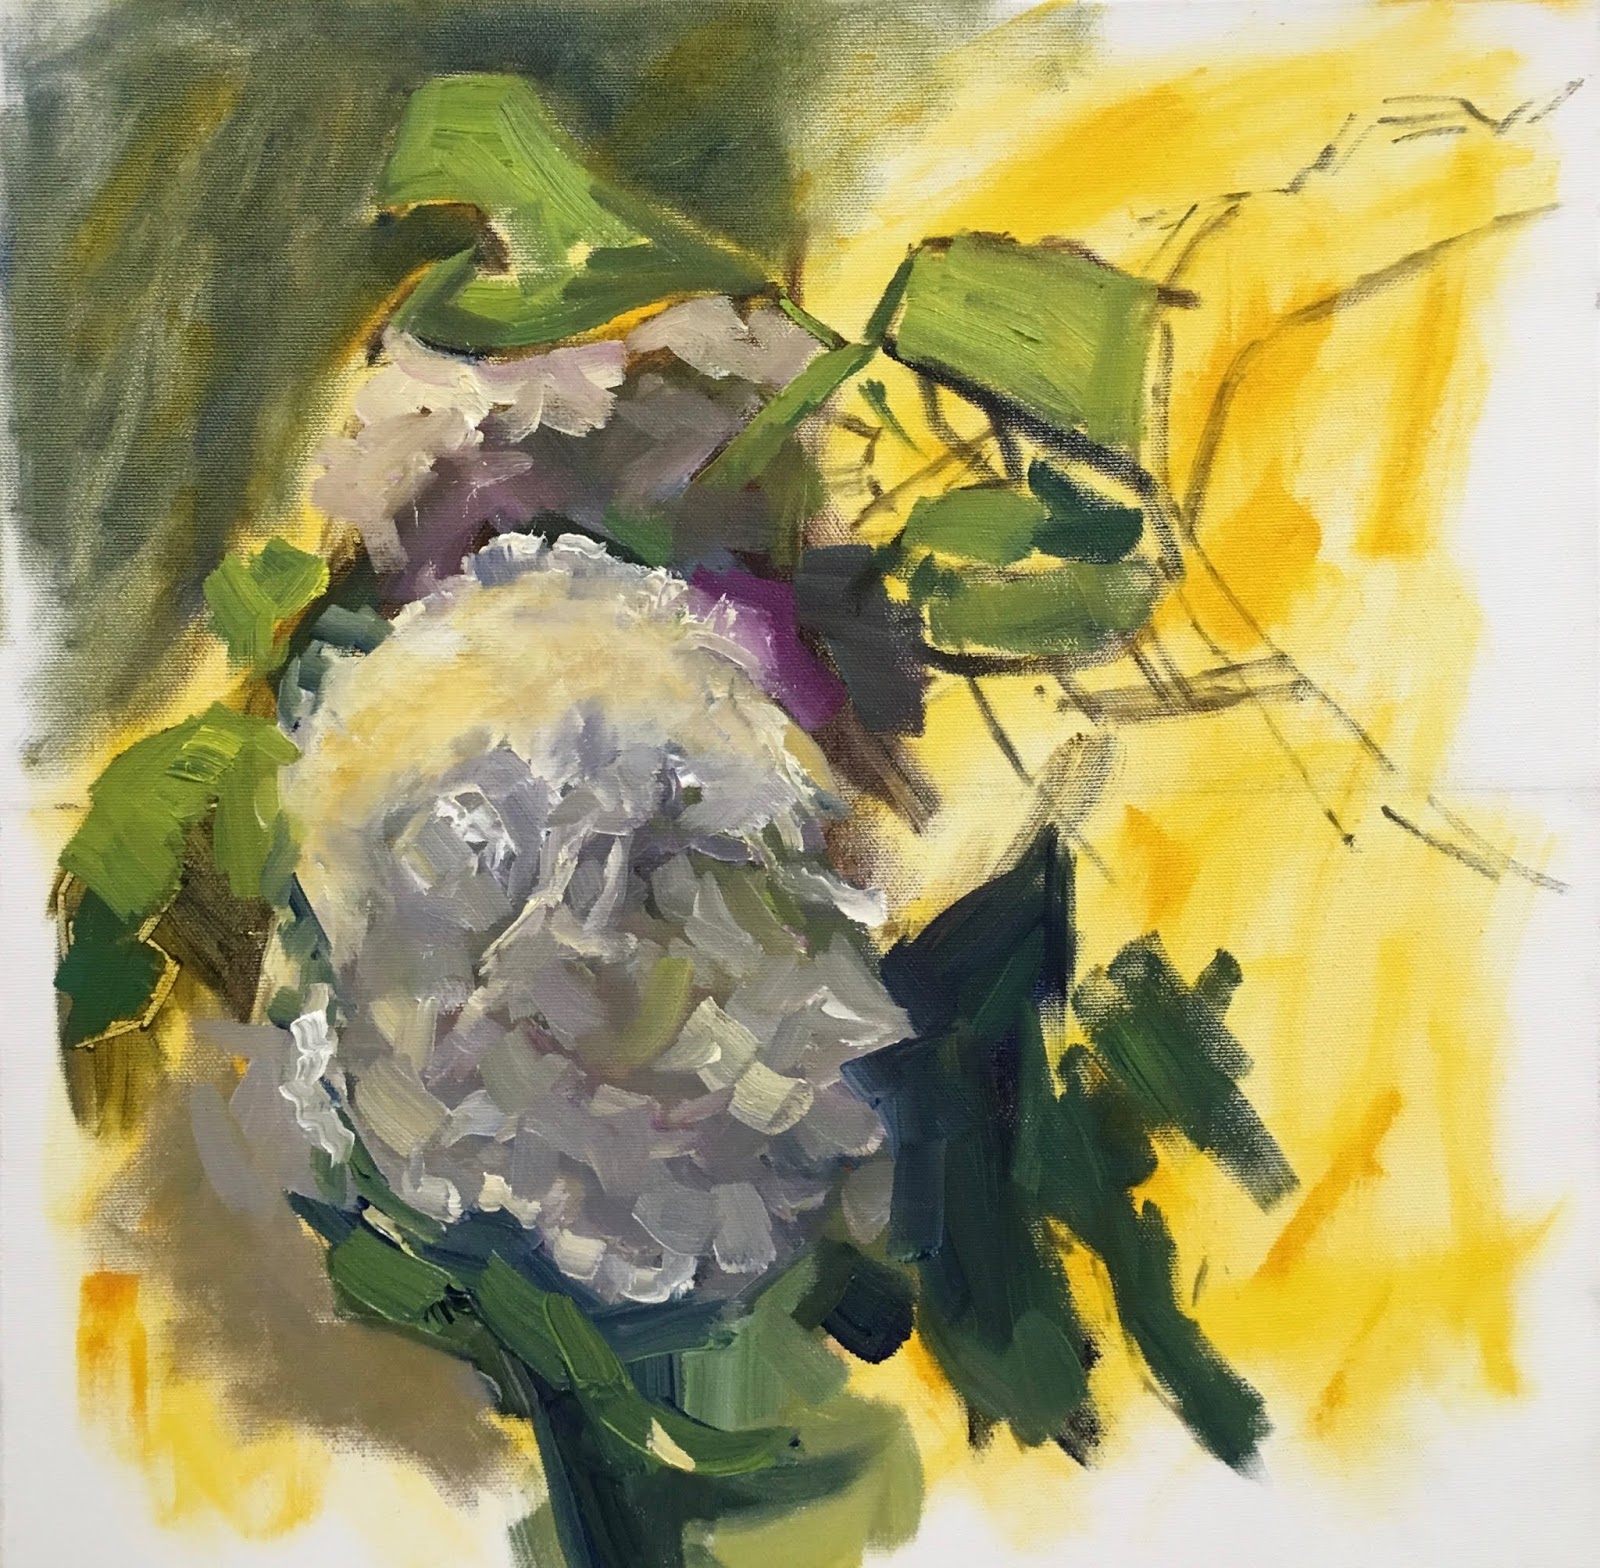
Painting White Hydrangeas in Oil Without Solvents - See all the Stages!


A few weeks ago, I taught a workshop on painting hydrangeas. I could not have chosen a more difficult image to demonstrate!

The reference I used was a stock photo. I try to use these in my workshops, so that students can show or sell their work if they wish. On sites like http://www.pexels.com and http://www.pixabay.com the photographer has given permission for their images to be used either free or at low cost. When doing my own non-class work, I always use my own photos.

I recommend starting out by putting a VERY thin layer of walnut oil on your support. I neglected to do this step during this demo, which made my life a lot harder when it came to getting paint spread out evenly on the canvas in the underpainting stage.

I used a 16" x 16" gallery wrap stretched canvas as my support. To apply the thin film of oil, I sprinkled a few drops with my palette knife onto the surface and then spread with the palette knife and followed by rubbing with a small cloth rag. After that, I used a palette knife to apply dabs of paint, which I then also spread around with a cloth, sometimes one colour, sometimes several as in this case. Paper towels are not a good choice as they leave bits of lint in your paint film.

Why do I do this method? Well, I do not wish to use toxic solvents such as odourless mineral spirits for health reasons. Just because it is odourless does not mean it is benign. Mineral spirits is an easy way to start a painting, but so is this, it is just a new way of doing things, but well worth it in my opinion.

After I massed in part of the painting with transparent colours, then adding the thicker, opaque paint at the end. I did not have time to do the entire painting as it is rather large for a demo, being 16 x 16 inches square.

See the initial steps of the process below. 

If you have any questions, please let me know and I will try and help!

First lay-in of transparent colours, starting with Indian Yellow spread thinly with a cotton rag

I put in the thick, creamy white paint of the flower in light to gauge my values, but scraped it out afterward to continue
Starting to put in background and two more flower heads plus leaves in shadow and light and another flower head sketched in upper right

Starting to put back the thick, light paint and some detail in the shadows
Done!

Thursday, November 01, 2018

Water Lilies - See The Painting in Progress!


November 1, 2018
UPDATE: Here is the next layer of this painting on the top - basically I just added thick light areas to the petals, so there is more definition. Still thinking about what else, if anything, needs to be done....


I am realizing that I really enjoy starting projects more than finishing them. At the beginning of a painting, it is all loose and splashy and fun - then things start to get more serious and the decisions become harder and I lose interest. How about you? Are you a starter or a finisher?

With this painting of water lilies, I used too much medium and it got really difficult to get the values I needed at the end, especially the highlights. So, I smoothed out the texture (you can see it is a little blurry) and let it dry. Now, I need to go back in and add those highlights and thick paint. I like to leave things a big abstract and painterly so the painting is not just about the subject but about the texture and paint quality.

Painting the Realistic Landscape


If you are wondering how this one turned out, please see the top image. 

I lightened the sky, greyed out the distant shrubberies and lightened the shadows a bit to be more airy. I also moved the top of the tree further from the edge and made the silhouette more random. I also added brilliant light green over the yellow of the ground in light. 

I tried to think of the principles of landscape painting which are that the sky is always the lightest mass (unless it is a sunny beach), the ground is next in value and the trees and upright masses (such as mountains) are darker in value. Things get more bluish and greyer as they go back in space. Although I liked the bright colour in Version #1, I think it has a more realistic feel now, what do you think?

Saturday, February 17, 2018

Life is Bowl of Cherries

7x7 inches, oil on canvas panel
I have drawings and paintings stacked up  at home, waiting to be photographed and posted, but here is my latest effort, a quick oil sketch that was a lot of fun to do.

I am currently doing a class in Florida, related to my other profession in the area of nutrition and health.

It has been heavenly to escape winter this year since it was a particularly brutal one in my area of the world.

I have managed to fit in a few painting sessions despite the busy schedule here.

If I could eat cherries every day, I would, but sadly we have to wait all year to enjoy them around early July. Something to look forward to after this long winter!

Monday, January 30, 2017

The Daily Painting Habit - Day 19 of 21 - Sport: Work In Progress!


10 x 8 inches - Oil on Archival Panel - "SPORT"
So, nearing the end of this challenge, I am realizing that I am constitutionally not cut out for completing a painting, even a small one, in a day. I need time to ponder and figure out if I am 100% happy. That is how I feel about this one, which is finished, yet I am not sure I won't revisit some tiny details once it is dry.

This cute puppy, like all babies, was a bit of a challenge. It is very easy to age the young of any species. I am going to let this dry and hit it again soon, especially with regard to brightening up some highlights, warming up the background just a touch and some other small details, but the bones are there.

Friday, January 27, 2017

Daily Painting Habit - Day 18 of 21 - Sunflowers on Lake

6 x 6 inches - Oil on Canvas - Sunflowers on Lake


More work on this little painting of sunflowers. I have been feeling kind of pressured to get a painting done every day, but my intention was really just to do some art every day. When I rush, I tend to make mistakes that end up taking me 3 times as long to correct. So, it is better to just relax and enjoy the process.

Thursday, January 26, 2017

Daily Painting Habit - Day 17 of 21 - Transparent Block-In of Sunflowers

Transparent Block-In of Shapes

It seems I am not cut out for this "painting a day" gig. Today, I spent most of my painting time fixing a whole bunch of minor things that bugged me on the painting I did yesterday (which basically still looks exactly the same to anyone but me).

 As a result, I just barely got started on this one of some sunflowers. This is the first stage with basic drawing and transparent block-in. And, because I am ADD, I also started a watercolour that I have been procrastinating on for about a year.

The completed Sunflower painting will be posted tomorrow, so stay tuned!

Wednesday, January 25, 2017

Daily Painting Habit - Day 16 of 21 - Pink Peonies

6 x 6 inches - Oil on Canvas - Pink Peonies

I prefer a brushy, painterly style, so I think this is finished. Peonies are so beautiful and lush.

Tuesday, January 24, 2017

Daily Painting Habit - Day 15 of 21 - Work in Progress - Pink Peonies

WIP - Transparent Underpainting

WIP - Starting to add more colour and correct shapes
So, today was pretty busy in my non-art life, so I just got started on this little painting of some pink peonies. I am always interested in seeing how a painting is made, so I hope you are too!

What attracted me to this subject was actually more the reflections in the glass jar, although peonies are my favourite flower!

Hopefully, tomorrow I will have time to finish this one.

Monday, January 23, 2017

Daily Painting Habit Challenge - Day 14 of 21 - Landscape

6 x 6 inches - Oil on Canvas


I was really attracted to the bright colours in this landscape. I used a palette knife in the creation of this painting, which adds texture.

Sunday, January 22, 2017

Daily Painting Habit Challenge - Day 13 of 21 - Paint Tubes with Brush

5 x 7 inches - Oil on Panel - Paint Tubes with Brush


Here is a little studio oil which was fun to create. Artists may recognize the Classico oil tubes, Gamblin Cold-Pressed Linseed Oil and Robert Simmons Signet brush.

This painting would look nice in a wide moulding. It is a piece I started awhile back, to which I just added some finishing touches.

Friday, January 20, 2017

Daily Painting Habit Challenge - Day 12 of 21 - Beets

6 x 6 inches - Oil on Canvas


It is January once again, the start of a new year and many of us are assessing our priorities and goals to figure out what we want to accomplish in 2017. I have quite a list of things I want to get done.

When it comes to my art,  I am once again joining Leslie Saeta's painting challenge and committing to finishing the 21-day daily painting project I set for myself (but didn't complete) in September 2016. Most of my work consists of large paintings that take a long time to create, so this is a fun break and a chance to try some new subjects and techniques.

As per usual, I am getting a late start, but I have just enough time left in the challenge to complete the "ten paintings in ten days" I need to do to finish my personal goal, a 21-day Daily Painting Challenge.

Painting every day, especially completing a small work all at once, is a great way to experiment with new subject matter, colour palettes and techniques. A lot of accelerated growth and learning is to be expected.

Here is my first small, daily painting of 2017 which is on the theme of my other obsession, which is food and nutritional healing, some BEETS!

Wednesday, September 28, 2016

Daily Painting Habit Challenge - Day 8 of 21 - Echinacea

14 x 10 inches - Oil on Canvas - Echinacea


Here is another piece from my pile of previous starts that is now almost done. I still need to varnish, which will unify and bring out the colours, adding depth and a slight sheen to the surface. It is much easier to photograph an unvarnished piece, especially one like this that is mostly low key.

Sunday, September 25, 2016

Daily Painting Habit Challenge - Day 6 of 21 - Pink & White Peonies

14 x 18 inches - Oil on Canvas - Peonies #2


This is a larger painting of my favourite flowers that I started some time ago. I made some new decisions, darkening the background and adding contrast for drama.

I also took the opportunity to sign it in a subtle manner with my favourite new tool - a rubber tipped scraper. This method is so much easier than trying to sign with a tiny brush later on.

Saturday, September 10, 2016

Daily Painting Habit Challenge - Day 1 of 21 - Pink Rose

6 x 6 Inches - Oil on Canvas - Glowy Pink Rose


Artist and marketing whiz, Leslie Saeta, holds a 30-day painting challenge two times every year. She also sells her art, teaches workshops, conducts online courses and has a podcast called "Artists Helping Artists". Interestingly, we were born on the exact same day and I think she got all the extra energy and ambition I was supposed to receive. Leslie is a dynamo and so inspiring in her ability to juggle so many things and get stuff done!

Since I was unable to start on schedule, and it is generally thought that it takes 21 days to create a habit, I have decided to embark on a 21-day painting challenge starting today. I tend to paint intensively, in spurts, and when I am able to immerse myself in creating art I usually work on a lot of things at once. It is harder for me to keep up a strict, daily painting habit, since it often seems that I do not have a large enough block of time to get much done. Then, there is all the cleanup required, scraping palettes, storing paint and my most dreaded task - brush washing.

This inaugural painting for my 21-Day Painting Challenge is a close view of a glowy pink rose. I enjoyed using transparent oils as my first layer and added the more opaque layers on top. The paintings I do for this challenge will be available for sale at a special price for a limited time so if you see something you like grab it while you can!

Thursday, June 30, 2016

Yellow Rose - Small Floral Oil Painting

6" x 6" oil on stretched canvas


The trick to drawing something this complicated is to grid it into sections (in this case, two lines on each horizontal and vertical aspect will create 9 squares. You can print out a black and white copy and use a ruler to divide your subject into equal boxes or purchase an app such as ValueViewer so that you can do it directly on your device. You can scale up or down but it is easiest to keep the image you are working from the same size as the one you are creating.

With flowers, you can also just wing it and try to suggest and capture the essence of the flower without slavishly copying every petal.

Sunday, February 14, 2016

Colourful Cat Pet Portrait Oil Painting with Loose Brushwork

Oliver in the Window - 6x8 Oil on Canvas Panel
It is no secret that I love cats. This one is especially beautiful, with his pink nose and creamy white fur. What appealed to me about this pose was the beautiful light effect from the window behind Oliver's head. The orange glow in his ears and sparkle on his whiskers captivated me. I also liked that there was some form with parts of him in light and shadow.

Colourful Mixed Bouquet Oil Painting and Using a Computer to Paint from Photos

Mixed Bouquet 12x9 Oil on Canvas Panel
Here is my final painting from the Dreama Tolle Perry Workshop I attended in January. For our third day, we all used our own painting reference, so everyone had a different subject to portray using Dreama's method. It was fun to try and capture the sheer ribbon.

Instead of using a printed photograph, I found a shelf at eye level on which to sit my laptop. I almost always paint from either life or a computer screen. Printed photographs do not provide enough information to see all the subtleties we perceive with our eyes and are frustrating to try and work with. They lie about value and color and compress either the darks or the lights. I love how looking at a photo with a computer is much more like seeing something in real life so would highly recommend using that if you are not willing or able to work from life. That being said, working from life is non-negotiable if you want to grow in your ability to see and paint well.